Users who are unable to connect to the wifi wavlink.com interface will not be able to control or manage the extender. The user should resolve the wifi.wavlink.com issue as soon as possible to prevent interruptions or illicit activities in the network. There could be a myriad of causes for the issue with the wifi.wavlink.com interface. Users are advised to establish an Ethernet connection between their devices in order to speed up the process of logging in.
Below are the troubleshooting steps a user needs to follow in order to fix the wifi.wavlink.com issue.
- 1. Examine the hardware connection and the light of the Wavlink extender. If there is a wired connection ensure that the indicator in conjunction with it’s LAN Port is illuminated. If the LED is illuminated indicates that there is a physical connection the two devices is correct. The next step is to proceed to the next stage of troubleshooting.
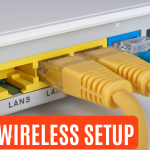
- 2. If you’re using wireless connections, switch to a wired connection – Utilize an Ethernet cable that connects one end of it to the computer, and the other connected to LAN port in your Wavlink extender.
- 3. Verify that your computer has received its correct IP address. You can determine an IP address for your PC via the control panel. Check that your computer is equipped with an IP address that is correct. Then proceed to the next step if you are unable to login on your wifi.wavlink.com interface.
- 4. Try another browser or erase the cookies from the current one. Start the browser, select the Tools menu and then select the Internet option. Choose “Delete browsing history” and click on “Delete browsing history” option and then select the Delete option. Select the items that you want to eliminate, such as temporary Internet cookies, files browsing history, download history as well as other. The process begins by entering the word Deleting history. Once you have done that, press the OK button, then close the dialog box at the final.
- 5. Make the reset procedure on your extender. Locate the reset button located on the back panel of your Wavlink extension range. Hold the reset button about 10 seconds. When all the lights on the device go off, press the button. All settings, including administrative, network, and configurations are deleted of Your Wavlink device. It is necessary to move to the next problem-solving step If you’re still not able to login.
- 6. Update the drivers on your PC- You may need to update the drivers on your computer to allow access with wifi.wavlink.com. wifi.wavlink.com interface. The manual guide for further details. After updating your drivers, make sure you can access wifi.wavlink.com. wifi.wavlink.com website or not. It is recommended to contact the Wavlink support team with any problem related to damaged hardware and the. If you’re Wavlink extender is covered under the warranty period, you may exchange it for a new one.
How do you join to the Wavlink extension to Wifi?
In order to set up the Wavlink extender within your network at home, the first step is to connect it to Wi-Fi. Users can connect using the default credentials listed on the Wi-fi configuration card, or follow the manual in order to join the Wi Fi of this Wavlink extender.
- 1. Connect to connect the Wavlink range extender into your power supply. Switch on the power source.
- 2. Give it a few minutes so that you to wait for a few seconds in order for the Power LED to turn on.
- 3. Check the Wi-Fi settings on your mobile or computer.
- 4. Choose to select the Wavlink Network name, and connect to it , typing down the Wi-fi password that is default.
You can get the default settings for wireless on this Wavlink range extender using its label that is pasted onto its reverse.
- 1. If you connect to the Wi-Fi connect to the internet and enter wifi.wavlink.com in the address bar in order to carry through the process of setting up.
- 2. Choose the language you wish to use as the interface. Type in the admin password that is default in the tab for passwords.
- 3. Hit the Login button.
- 4. Choose the country region where you’ll use with the extender.
- 5. Choose the time zone that corresponds to your region chose.
- 6. Create a new login account password to the Wavlink extender’s login screen from The login tab.
- 7. Click Next after you’ve finished.
- 8. Customize the Wi-Fi settings of your extender, including the name of the network along with the Wi-fi password as well as the security settings for the extended network.
- 9. Be sure to perform all other configurations in a safe manner, including agreeing to the conditions and terms.
- 10. Click the Apply button once you’re finished.
- 11. Return to the Wi-fi settings on your device and confirm for the SSID name you chose to assign.
- 12. Connect to the network by using the Wi-fi password that you entered in the field provided. Click Connect and connect the device to your network.
Keep in mind that you are able to keep the Wi-Fi settings that are default for your extended network by not altering any Wireless settings in the process of setting up. However, users are advised to alter the wireless settings due to security reasons. You can modify the settings for wireless of the range extender at any time by via wifi.wavlink.com interface. WiFi wavlink.com interface.